import param as pm
import panel as pn
pn.extension()Week 10B: Dashboarding with Panel and the Holoviz Ecosystem
- Section 401
- Nov 8, 2023
Great examples on their documentation
For more information, see the galleries on the Panel documentation:
- App Gallery
- Examples of end-to-end web apps using Panel
- Component Gallery
- Examples (code snippets) for the types of panes, widgets, and layouts possible in Panel dashboards
Two example repositories on the course’s GitHub
Example 1: Philadelphia shootings
- Tools: Panel, Hvplot/Holoviews, Altair, Folium
- This includes two separate apps:
app1.ipynbandapp2.ipynb
https://github.com/MUSA-550-Fall-2023/philadelphia-shootings-app
Example 2: NYC Taxi Trips
- Tools: Panel, Hvplot/Holoviews, Altair, Datashader
- This includes a single app:
app.ipynb
https://github.com/MUSA-550-Fall-2023/datashader-nyc-taxi-app
Panel Deployment Options
There are two options for deploying Panel apps: Binder & Hugging Face.
Option #1: Binder
- The example Panel apps provide options to launch the apps from the GitHub repositories on Binder
- A free service!
- A reasonable amount of free storage provided, e.g., enough to host the dataset of 1 million taxi trips
To generate custom links for your Binder apps that say launch app and launch notebook using this page: https://mybinder.readthedocs.io/en/latest/howto/badges.html.
You can create the link for your app from the Binder homepage: https://mybinder.org/
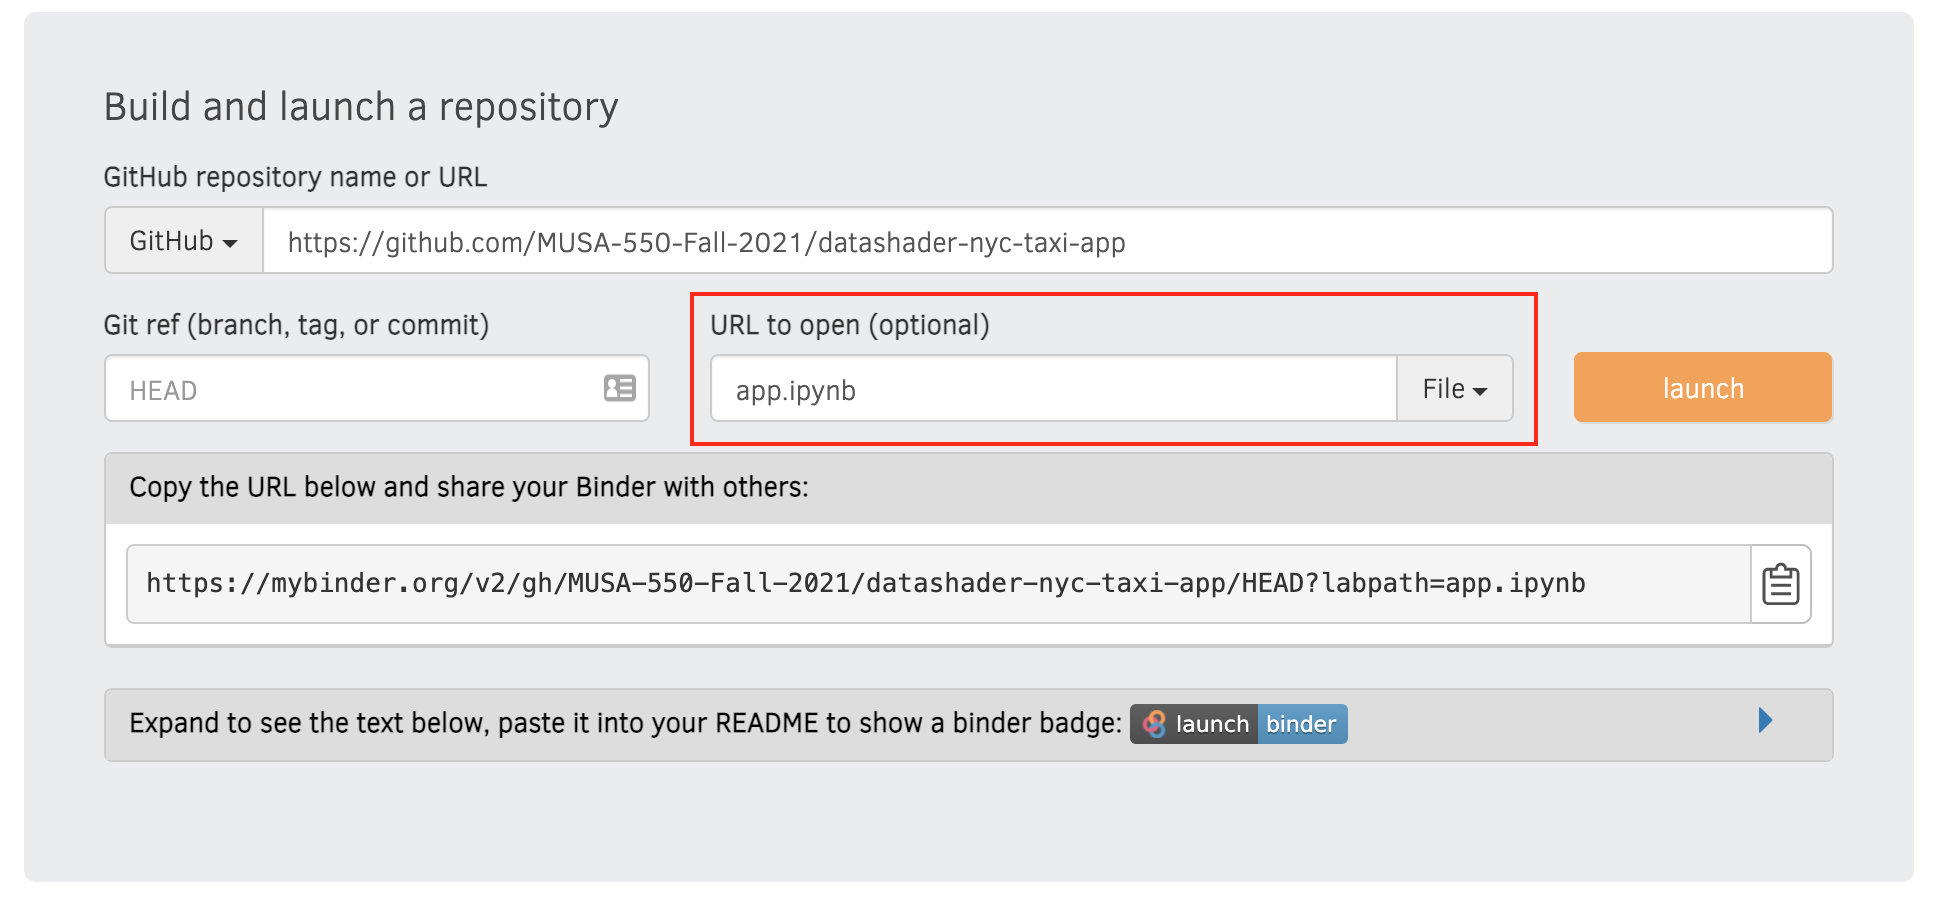
You’ll want to create two links:
The app.ipynb notebook:
- Enter your repository URL
- Specify the file path as
app.ipynb(or whatever you app notebook is called)
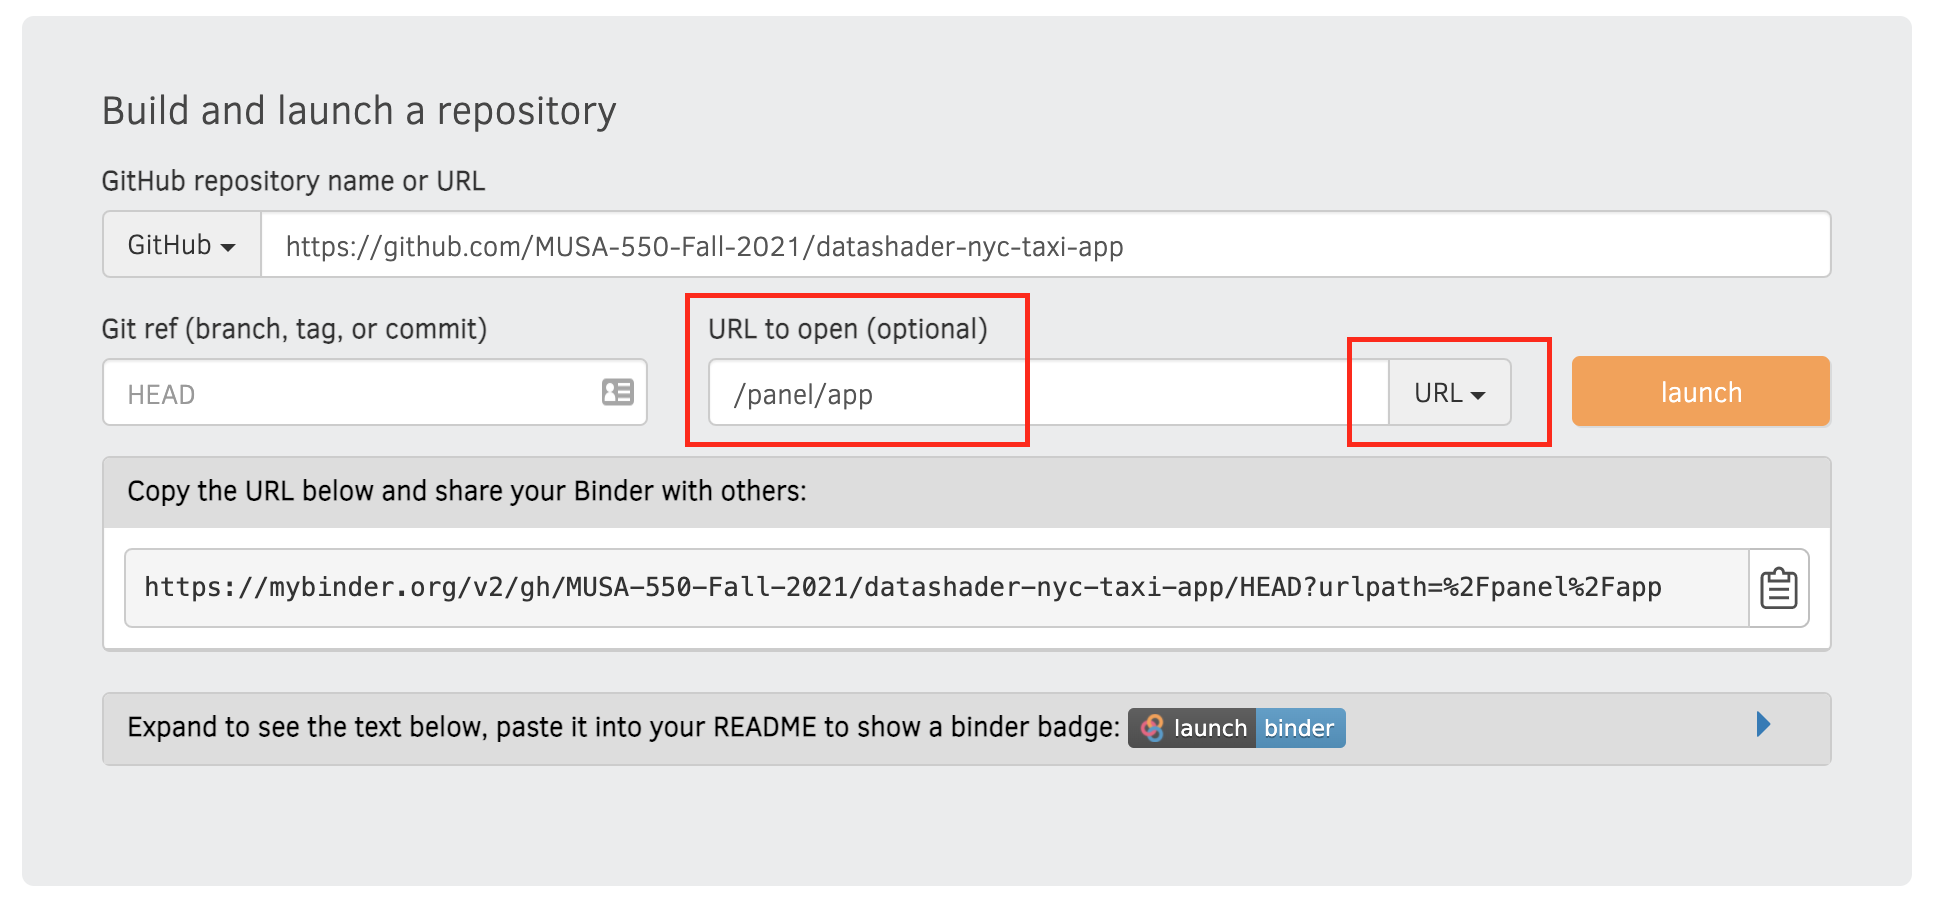
The URL for the app itself
- Enter your repository URL
- Specify the URL path as
/panel/app
Note: if you named your file name app-name.ipynb, you should instead use: /panel/app-name
Option #2: Hugging Face
This section describes how to deploy a Panel app to Hugging Face. See the Panel documentation for additional info.
Note
I’ve deployed “app2.ipynb” from the philadelphia-shootings-app to Hugging Face. That’s a good reference if you’re deploying an app on Hugging Face.
Hugging Face makes deployment of arbitrary apps including Panel apps and dashboards very easy and provides a free tier to get you started. This makes it a great starting point for users not too familiar with web development and deployment.
To get started, click on the following URL:
https://huggingface.co/new-space
Once you load the above page, select the “Docker” Space SDK and then select the “Panel” template below it.
This will create a new “space” (like a GitHub repository) on your Hugging Face account and deploy an example Panel dashboard. It will add code for the dashboard to the app.py file in the space. If you don’t have an account yet, it will prompt you to sign up when you click on the link below.
We can edit the template files in the browser to deploy our own dashboard instead of the example dashboard. Navigate to the “Files” tab in the space and we’ll modify these files so our own dashboard will deploy.
Here are the steps involved:
Upload a “requirements.txt” file that includes all of the requirements for your project. See the requirements.txt file in this repository as an example. Hugging Face will install these dependencies using
pip.Upload your Panel dashboard Jupyter notebook. For example, in this repository I uploaded “app2.ipynb”.
Edit the “Dockerfile”. By default, it serves the panel dashboard in “app.py”. Change “/code/app.py” in the Dockerfile to the name of the notebook you uploaded in step #2. For example, for this repository, I changed it to read: “/code/app2.ipynb”.
That’s it! You should see your app “Building” and then “Running” in the Hugging Face UI. If there’s an issue during installing the packages in your “requirements.txt”, you’ll see a “Build error” or “Runtime error”. You can check the log output to see what went wrong and try to debug.
If everything worked, you can click on the “App” tab next to the “Files” tab to view your app!
Exercise, time permitting
Let’s modify “app1.ipynb” in the philadelphia-shootings-app repository to add a dropdown widget that allows the user to see data for a victim’s race/ethnicity.
Step 1: Create a copy of the repository
The philadelphia-shootings-app repository is a template repo, meaning you create a copy under your own GitHub username.
Step 2: Add a new parameter
Add a new parameter to your dashboard class. You’ll want to use a pm.Selector parameter. For the list of available races, let’s use “All”, “W”, “B” to give the user the option of seeing all data, White victims only, or Black victims only.
As an example, here’s what the pm.Selector parameter gets rendered as by Panel:
class ExerciseExample(pm.Parameterized):

race = pm.Selector(default="All", objects=["All", "W", "B"])pn.Param(ExerciseExample.param)Step 3: Update the pm.depends() decorators
Update the dependencies in your depends() decorator to include your “race” parameter in addition to the “days” parameter.
Step 4: Update the get_data() function
Now, the get_data() function should return the subset of the data that depends on what the value of the “race” parameter is. If that parameter is “All”, no need to do any additional filtering, but if it’s “W” or “B”, you should filter your dataframe and based on the “race” column.
Solution
See the app3.ipynb in the “philadelphia-shootings-app” for the solution!
That’s it!
On to “data science in the wild” and predictive analytics next week!