File paths and working directories
Below is a guide from one of our course’s previous TAs, Eugene Chong. It does a great job laying out the common issues associated with file paths and Python.
A common challenge in collaborative data science work is dealing with file paths. A csv on your computer has a different file path than a csv on your colleague’s computer, and if you don’t plan ahead for that, your colleague won’t be able run your code on their computer without making (possibly many) changes.
This post contains a suggestion for how to organize your files and a glossary of terms. I’ll update it as things come up. Please let us know any questions!
Absolute v. relative file paths
Problem: I write pd.read_csv("C:/Users/eugene/data.csv") in my code and send it to a project partner, Gritty. Gritty tries to run it, but it fails, and they have to change the code to pd.read_csv("C:/Users/gritty/data.csv") to make it work. These are known as absolute file paths, which point to the exact location of a file on a computer, and generally they make it difficult to share code.
One way to deal with this is to organize your projects (e.g., a homework assignment) into self-contained folders. Something like the below:
C:
|__ /Users
    |__ /eugene
        |__ /MUSA550
            |__ /Homework1
                 |__ homework1_notebook.ipynb
                 |__ /Data
                      |__ data.csv
With this, I could instead write pd.read_csv("Data/data.csv"). Then, I could send Gritty my entire Homework1 folder or upload that folder to GitHub as a repository, and Gritty can run the notebook without making any changes. These are relative file paths, which point to the location of a file on a computer relative to the working directory (i.e., the folder where homework1_notebook.ipynb is saved).
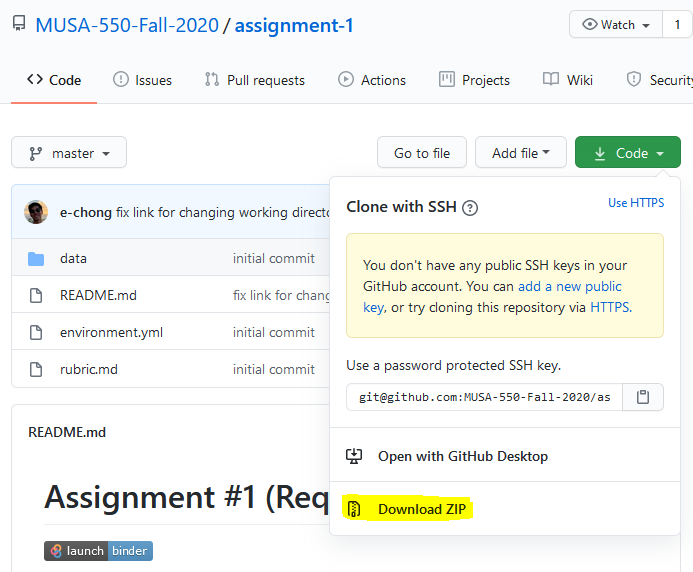
For your homework assignments, the most straightforward way to structure your files is to download the entire GitHub repository for that assignment (see below). Then, you can create a Jupyter notebook in that folder and, when you’re finished, upload it to GitHub. This way, when we download the repository for grading, or you open the notebook on a different computer, everything will run without changes (assuming you used relative file paths).
Glossary
These terms/commands work in Jupyter Notebooks, and they also apply to any command line tools you might encounter, like the Terminal, git bash, etc. except the Windows Command Prompt, Miniforge Prompt (which is actually just a wrapper around the Command Prompt), and Windows PowerShell.
home directory: Also referred to as ~. This is the directory for your particular user on your computer. In Windows, it’s usually something like C:/Users/eugene. If you open Terminal/Miniforge Prompt, it will be at this location by default.
root directory: Also referred to as /. This is the very highest level directory in your computer, where your operating system folders and such are located. We won’t be doing anything here, since deleting files can mess things up (I don’t think you can even open the root directory in the Windows File Explorer).
working directory: Also referred to as .. Relative file paths will be relative to this location on your computer. You can run the command pwd (“print working directory”) in either your Jupyter Notebook or the Terminal to see your current working directory. Note that ./subfolder/data.csv and subfolder/data.csv are the same; the first explicitly references the working directory, whereas it’s only implied in the second.